Easy Halloween Boo Bag Ideas (with free printable)

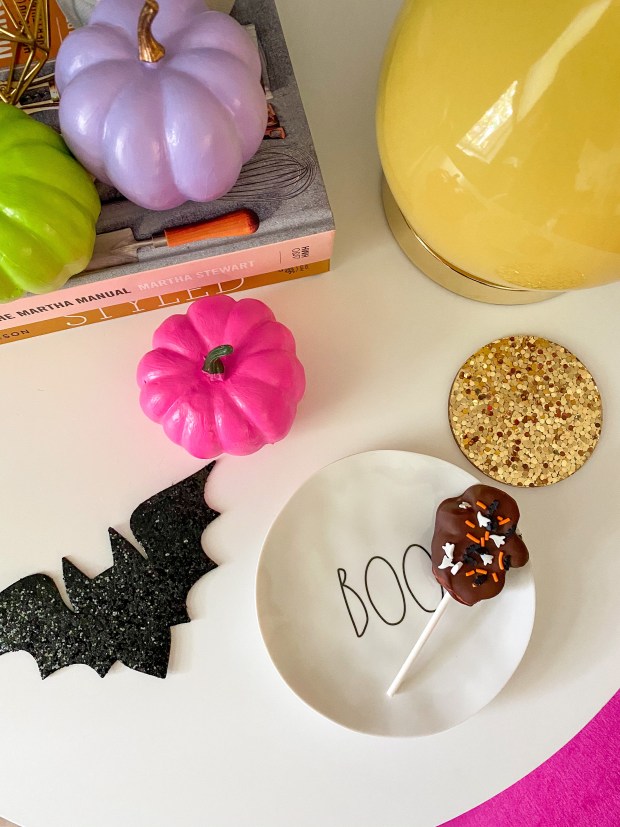
This Halloween things are more than likely going to be different! I have no clue how we are celebrating yet. It makes me a little sad for my kids, well, Millie at least- Clark doesn’t anything about Halloween yet! I have gotten in the Halloween spirit this year! I started early and have made a cute cake, threw a Ghouls Only Tea Party, and cute Ghost Pops!

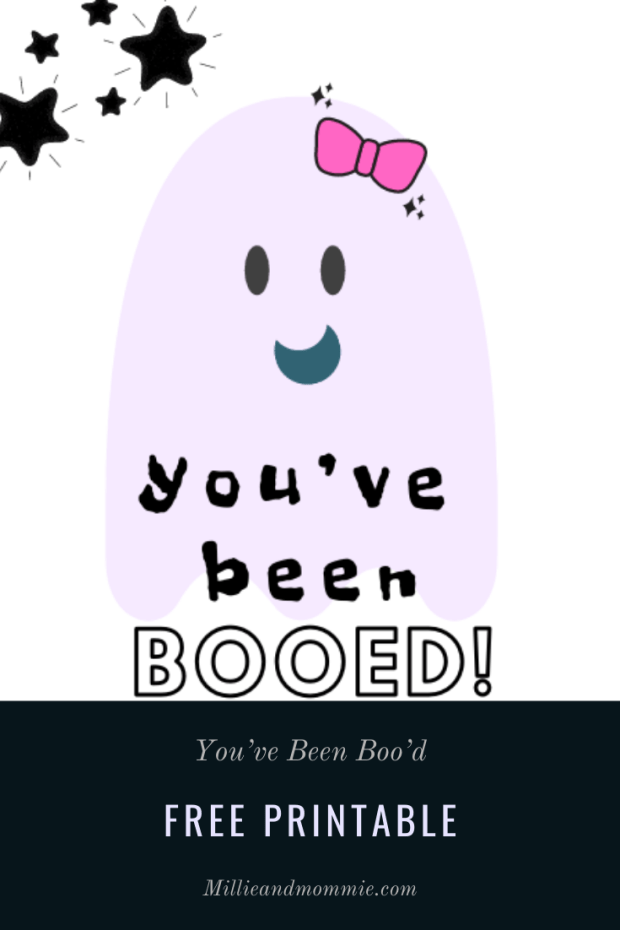
I have seen people make Boo Bags before for their neighbors and friends and thought it was so cute and a great way to spread some holiday cheer! Since we more than likely won’t be seeing a lot of friends this Halloween I decided to make “You’ve Been Boo’d!” Bags for our friends. There were easy and fun to make. It really took no time at all. I created printables for the bags too! You are welcome to download and use for your Boo Bags!

There are SO many ways you can make these. There is no right or wrong. I have seen extravagant ones and simpler ones. It is the thought that counts! Some ideas of what to put in the bags include:

  • Candy
  • Small toys
  • Play-doh
  • Snacks (goldfish, fruit snacks, etc)
  • Crayons
  • Stickers
  • Wands
  • Drinks (alcoholic for adult bags)
  • Glow sticks
  • Homemade treats (cookies, cupcakes, etc)
  • ANYTHING!

You can literally do WHATEVER you want or you think your friends would like! Keep in mind peoples food allergies or restrictions when making them too!

Since our kids are small -3 and under -I made mine for littles. I included: Candy, Goldfish, vampire teeth, halloween notebook, and a sticker sheet. I got most things at the Target Dollar Spot. I used Orange Bags to put everything in and topped with white tissue paper. I made the “You’ve Been Boo’d” printables (free to print out and use!). I taped the printable on the bag and delivered to friends! Super easy and the kids have seemed to enjoy them. It is a simple gesture that can brings some Spooky Cheer to your friends and family.

Be sure to check out our other Holiday Posts!!

Spooky and Cute Halloween Cake (semi from scratch)

I love to bake and I love Halloween so baking a Halloween cake was so fun! This cake is easy to make and it is always delicious. The recipe has cake mix and pudding in it. The pudding make it super moist. I have made it for years but then had the idea to decorate it for Halloween! It usually is dusted with powdered sugar, but I wanted to do something festive. The decorating is simple too. The ‘hardest’ part it doing the eyes!

I always scroll through Pinterest to get ideas and inspiration. I have seen so fun Halloween inspo for cupcakes and cookies, but couldn’t find anything simple enough for me! So I took a bundt cake recipe I have used forever and added some fun! I have seen people melt the store bought frosting and drip it onto cakes so I decided to try that!! It worked! I bought cute sprinkles from Michael’s that I found in different colors and textures. This is what I think is key- having the different textures and sizes to the sprinkles.

  • 1 package Yellow Cake Mix
  • 1 package Chocolate Pudding Mix
  • 8 oz Sour Cream
  • 1/2 C Vegetable Oil
  • 1/2 C Water
  • 4 eggs Slightly Beaten
  • 1.5 C Semi Sweet Chocolate Chips

You mix all the ingredients together and pour into a GREASED bundt cake pan. Bake at 350* for 40-50 mins. Once baked, let it cool for 10 minutes and remove from pan and place on cooling rack for 45min or more to cool. Once the cake is cooled you can decorate!

I used store bought icing and color gel food coloring. I slowly added the food coloring until I got the lavender color I wanted. I put the icing in a microwave safe bowl and microwaved in increments of 15 secs until I got the consistency I wanted. I did not want it too thin and runny, I wanted it still a bit firm, but with enough movement to pour and make the fun drips. I poured the frosting on slowly and went around a couple of times until I achieved the look I was going for. Next I did the sugar crystal sprinkles, the pink jimmy sprinkles, then the green round one. At the end I added the eyes. I placed two eyes next to each other around the cake at different levels.

And Viola! Our not so spooky Halloween Bundt Cake! Millie was VERY impressed! She said “Wow it looks bootiful mommy!!”. It was really sweet to hear how impressed she was in her voice and intonation! Making magic in the kitchen is one of my favorite things to do. I love the joy it brings me and my family.

Halloween Cake

Easy and Cute Chocolate Covered Ghost Marshmallow Treats

Today we made the cutest and easiest little Halloween Treat! Millie LOVES marshmallows and since Peeps isn’t making their holiday treats this year (dang you Corona) I decided to make a little something special. This was very simple to prep, make, and clean up.

Ghost Marshmallow Treats

I found Ghost Marshmallows at Walmart- their brand. I bought dipping chocolates, halloween themed sprinkles, and I had the cakepop sticks. I used wax paper to put chocolate covered ghosts on to decorate and put them in the fridge for 15 minutes or so to set. That’s it! So SIMPLE! Millie LOVED doing this. She needed some hand over hand to help with the dipping, but she did all the decorating with the sprinkles! She loved that part….and she ate all the sprinkles. She is so silly!

Ingredients-

  • Ghost Marshmallows (Walmart)
  • Dipping Chocolate
  • Cakepop/Lollipop Sticks
  • Halloween Sprinkles
  • Wax Paper

First put the stick into the Ghost Marshmallow. Then dip the marshmallow into the chocolate and tap off the excess chocolate. Place on the wax paper and top with sprinkles immediately. Once all done put in the fridge for 15 mins or so to set up, then you’re able to take out of the fridge.

These would be so cute for a little halloween party or to give out for Boo Baskets for friends! I hope y’all like them as much as we do!

Fun and Simple Halloween Party for Kids

Wanting to make a simple and fun Halloween Party? That is what we did the other day! Millie wanted to have a tea party with her favorite dolls so I decided to make it a girly halloween theme! It was so simple to set up. The adorable Ghost plates, napkins and cups were sent to us from Pom Pom Party shop . I had some little bats and skull rings I picked up at the Dollar Store and purple pompoms that I sprinkled around the table.

Halloween Tea Party

I made a fun Halloween inspired charcuterie board. I used Reese’s Pieces, powdered sugar donuts, brownie bites, bat marshmallows from Walmart (there is no Peeps this year- so finding these was fun!), and Halloween Joe Joe’s from Trader Joes. I used a tupperware lid to make the board. It helps having a lip to hold everything on. I tried to do black and white for the Halloween theme on the board and sprinkle in the colored Reese’s Pieces around to fill in the holes. So simple!

We set up her little table in the yard and had our party!! She couldn’t wait to dig into the donuts! Those are her favorite. This was a simple and fun way to brighten our week. It took no time to set up and was adorable. Her sweet Cuddle and Kind Dolls, Zoe and Chloe, had a great time too!

Halloween Tea Party Set Up

This is an easy party you can set up for your little one and their dolls or other friends! Having a girls Halloween party was too sweet!

Halloween Charcuterie Board
Kids Halloween Party

DIY Colorful Pumpkins

Fall…seems like it’s most people’s favorite time of year. I enjoy decorating for all the holidays but it’s not a secret I don’t really like the browns, tans, oranges that are the popular fall colors. I prefer bright and fun colors! There is NO reason that those colors can’t be on all my Halloween and fall decor!

It is hard to find colorful pumpkins so I decided to make my own. It was cheap and simple. I bought pumpkins at the dollar store and the acrylic paint I already had. I didn’t want them ALL the same so I got a few different sizes and shapes for the pumpkins.

There is two steps for the pumpkins. To start you want to wipe down your pumpkins with rubbing alcohol to get any stuff off. This helps the paint go on better. Trust me. I lay down a large plastic table cloth from the dollar store that I can use a few times for crafts then throw away.

For painting the pumpkins I found that acrylic paint works best. I did it with another paint first on a couple and they didn’t turn out as well. You will need to paint two coats on the pumpkins. That’s it! That’s all you do! Wipe with alcohol then paint! So simple.

You could use any colors you wanted – even if you didn’t want brighter colors. I am going to do larger pumpkins this year! Do you like fall colors or do you prefer brighter?